OpenBSD 6.6: switching back from httpd to nginx

I really like the idea of httpd being secure and lightweight and all, but I also need flexibily, especially from my webserver. Couple of things I was missing in httpd are:

  • configuring multiple files as index: index "index.html index.php index.htm"
  • block access to certain locations based on IP
  • using custom error pages
  • dynamic vhosts (although I still have to figure out how to do those with https)

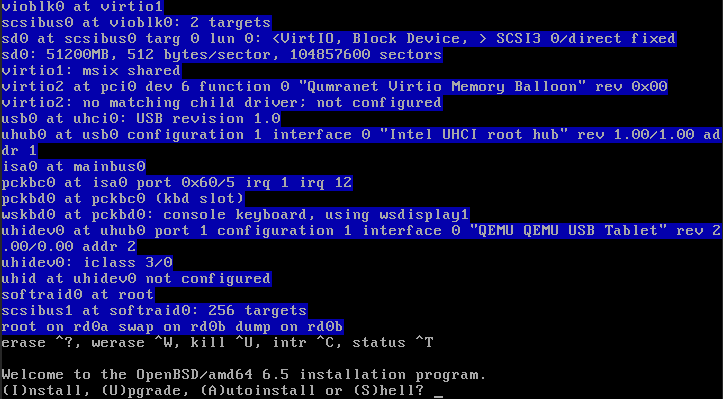
I read man pages, asked questions online, used google (as it turns out openbsd httpd is a really shitty search-query when you don’t just want to install wordpress….). I even looked at the code, but my C knowledge is rusty, I know where to make the needed changes in the code, but don’t know quite how to do it. And while I love to learn, that will take some time and quite frankly I don’t have that right now, so…. Let’s go back to nginx!

OEMP!

$ doas pkg_add nginx
$ doas mkdir /etc/nginx/sites-available
$ doas mkdir /etc/nginx/sites-enabled

For now I just wanted my sites back online; I tweaked /etc/nginx/nginx.conf so it uses sites-available and sites-enabled directories:

# /etc/nginx/nginx.conf:
worker_processes  1;

worker_rlimit_nofile 1024;
events {
    worker_connections  800;
}

http {
    include       mime.types;
    default_type  application/octet-stream;
    index         index.html index.php index.htm;

    keepalive_timeout  65;
    server_tokens off;
    disable_symlinks off;

    include sites-enabled/*;
}

Simple and effective main nginx.conf that came with the install with all outcommented lines deleted. After that I created /etc/nginx/php-fpm.conf that can be included in every site-config that needs it:

# /etc/nginx/php-fpm.conf
# pass the PHP scripts to FastCGI server listening on unix socket
#
location ~ \.php$ {
   try_files      $uri $uri/ =404;
   fastcgi_pass   unix:run/php-fpm.sock;
   fastcgi_index  index.php;
   fastcgi_param  SCRIPT_FILENAME $document_root$fastcgi_script_name;
   include        fastcgi_params;
}

So now for a simple site that allows for dynamic vhosting using only http:

# /etc/nginx/sites-available/dynamic.vhosts
server {
	listen 80 default_server;
	listen [::]:80 default_server;

	index index.php index.html index.htm index.nginx-debian.html;

	set $basepath "/vhosts";
	set $domain $host;

	if ($domain ~ "^(.[^.]*)\.(.[^.]*)$") {
		set $rootpath "$1.$2/www/";
		set $servername $domain;
	}

	if ($domain ~ "^(.[^.]*)\.(.[^.]*)\.(.[^.]*)$") {
	        set $rootpath "$2.$3/$1/";
                set $servername $domain;
	}

	server_name $servername;
	root $basepath/$rootpath;

	location / {
		# First attempt to serve request as file, then
		# as directory, then fall back to displaying a 404.
		try_files $uri $uri/ =404;
	}

	include php-fpm.conf;
}

Enable this site:

$ doas ln -sf /etc/nginx/sites-available/dynamic.vhosts /etc/nginx/sites-enabled/dynamic.vhosts

With all the configfiles in place it is time to switch:

$ doas rcctl stop httpd
$ doas rcctl disable httpd
$ doas rcctl enable nginx
$ doas rcctl start nginx

Of course this is not yet final, I’ll have to setup nginx to respond to the acme-challenges that I have in my cron, I still have to setup https too, but at least my sites are back online no matter whether they have an index.html or an index.php.

Upgrading to OpenBSD 6.6

Released on October 17, 2019, there is the new version of OpenBSD. Time to try to upgrade with the all new sysupgrade tool. Should be breeze, right?

On the console I typed:

$ doas syspatch
$ doas sysupgrade

In case the sysupgrade tool is not yet on your 6.5 installation, you install it with syspatch. After that you upgrade to 6.6, easy as pie!

There already a few patches out for 6.6 so make sure to patch your current install right away:

$ doas syspatch

Last thing to do is to update your packages:

$ doas pkg_add -u

And your done….

Vhosts and https in OpenBSD’s httpd

In the previous post I got my OHMP stack running; OHMP is like LAMP or LEMP, but runs on OpenBSD, using it’s native httpd, topping it of with MariaDB and php.

I used phpmyadmin to verify everything is working fine, and it is, but for starters I don’t want my phpmyadmin to be accessible from all over the world, only from some trusted ip’s. With webservers like Apache and nginx it is very easy to do, but as it turns out, in httpd it is not. The most simple solution is to let PF do the ip restrictions for you. With the firewall rules I have in place only my http and https ports are globally accessible, all other ports are only accessible from a pool of trusted ip’s and ip-ranges. So when I change my /etc/httpd.conf to:

types { include "/usr/share/misc/mime.types" }

server "phpmyadmin" {
  listen on * port 8080
  directory { index "index.php" }
  root { "/htdocs/phpmyadmin" }
  location "/*.php*" {
    fastcgi socket "/run/php-fpm.sock"
  }
}

I now have phpmyadmin available on port 8080, only accessible from the trusted pool. Next we install acme-client:

$ doas pkg_add acme-client

Add another server in httpd.conf that serves the acme-challenge and redirects http to https:

server "default" {
  listen on * port 80 

  location "/.well-known/acme-challenge/*" {
    root "/acme"
    request strip 2
  }
  location "/*" {
    block return 301 "https://$HTTP_HOST$REQUEST_URI"
  }
}

Now we are ready to configure acme:

$ cp /etc/example/acme-client.conf /etc/acme-client.conf

Let’s add our domain to the file: for the purpose of this post I stick to the example.

domain example.com {
  alternative names { secure.example.com }
  domain key "/etc/ssl/private/example.com.key"
  domain full chain certificate "/etc/ssl/example.com.fullchain.pem"
  sign with letsencrypt
}

Now you have to take care of which version of OpenBSD you are running, because there are a few changes that got me confused. In order to do the first certificate request their must be an account key file and a private key for the server. Latter versions of acme-client will make those automatically, but the version that came with OpenBSD 6.5 needed specific flags to make them:

$ doas acme-client -vAD example.com

Now that we have our certificate we can adjust httpd.conf to add another server:

server "example.com" {
  alias "secure.example.com"
  listen on * tls port 443
  tls {
    certificate "/etc/ssl/example.com.fullchain.pem"
    key "/etc/ssl/private/example.com.key"
  }
  root "/vhosts/example.com"
  directory index "index.php" 
  
  location "/*.php*" {
    fastcgi socket "/run/php-fpm.sock"
  }
}

Test configuration and reload the configuration of your webserver:

$ doas httpd -n
$ doas rcctl reload httpd

Point your browser to http://example.com and it should redirect you to https! Next step is to automate the certificate renewal process:

$ doas crontab -e

To have acme-client check every night at 02:30:

30	2	*	*	*	acme-client example.com && rcctl reload httpd

Now you can repeat this process for all domains and subdomains you are hosting. I also tweaked my config to use https for phpmyadmin:

types { include "/usr/share/misc/mime.types" }

# DEFAULT: acme-challange and http->https redirects for all
server "default" {
  listen on * port 80 

  location "/.well-known/acme-challenge/*" {
    root "/acme"
    request strip 2
  }
  location "/*" {
    block return 301 "https://$HTTP_HOST$REQUEST_URI"
  }
}

# PHPMYADMIN: http->https redirect (8080->8443)
server "phpmyadmin-http" {
  listen on * port 8080
  block return 301 "https://example.com:8443$REQUEST_URI"
}
# PHPMYADMIN: serve over https
server "phpmyadmin-https" {
  listen on * tls port 8443
  tls {
    certificate "/etc/ssl/example.com.fullchain.pem"
    key "/etc/ssl/private/example.com.key"
  } 
  root "/htdocs/phpmyadmin"
  directory { index "index.php" }
 
  location "/*.php*" {
    fastcgi socket "/run/php-fpm.sock"
  }
}

And then it turned out that I was not satisfied with httpd and I needed to switch back to nginx!

Installing LEMP on OpenBSD 6.5

After installing and hardening my OpenBSD box it’s time to get some action done. Let’s get that LEMP stack, or rather the OHMP stack, because I am going to use OpenBSD’s httpd, MariaDB and PHP-FPM. And when I am ready I am going to install TLS certificates with Let’s Encrypt’s certbot.

I used this tutorial on h-i-r.net about setting up OHMP to get a bit more understanding about what was needed. Thanx Ax0n!

Let’s GO!

$ doas pkg_add php-mysqli mariadb-server

This will get all the needed packages. Configure MariaDB and enable php-mysqli:

$ doas /usr/local/bin/mysql_install_db
$ doas rcctl start mysqld
$ doas /usr/local/bin/mysql_secure_installation
$ doas ln -sf /etc/php-7.3.sample/mysqli.ini /etc/php-7.3/mysqli.ini

Create /etc/httpd.conf and put in:

types { include "/usr/share/misc/mime.types" }

server "default" {
  listen on * port 80
  root "/htdocs" 
  directory { index "index.php" }
  location "/*.php*" {
    fastcgi socket "/run/php-fpm.sock"
  }
}

And make sure everything is enabled and start at reboot:

$ doas rcctl enable httpd
$ doas rcctl enable php73_fpm
$ doas rcctl enable mysqld
$ doas reboot

Verify the stack

Download phpmyadmin into /var/www/htdocs/phpmyadmin. Make sure to set $cfg['Servers'][$i]['host'] to 127.0.0.1 in the config.ini.php file so it will try to connect over TCP instead of using a socket. And verify that you can use php to access mysql. When logged in with phpMyAdmin you should follow the warnings it will give you to finalize your installation.

$ doas pkg_add php-curl
$ doas ln -sf /etc/php-7.3.sample/curl.ini /etc/php-7.3
$ doas rcctl restart php73_fpm
$ doas chmod -R 777 /var/www/htdocs/phpmyadmin/tmp

Ready!

Now in theory you have your OHMP stack right there. You could install WordPress and run your own blog, for instance! But I have other plans with this machine, I want it to run multiple domains and subdomains, and I want to run them under https. So let’s go to the next chapter…

Random parts of command line foo that make your life really easy but I have to google everytime because I am still a *nix n00b

Although I worked with Ubuntu for quite some years I still have to google some of the simpliest task, just because I hardly ever need them. The most simple examples being how to add a user to a group, or see how much space I have left on my disks…

Instead of googling everything again and again, I am going to collect them in this post:

Users

Add a user to a group:

# usermod -aG sudo remy

Diskspace

See how much space the subdirectories of your pwd are taking up:

$ du -sk *

Or when you want to look one level deeper, which comes in handy when I want to see which domains and subdomains I have in my /var/www/vhosts directory:

$ du -kd 1 *

Prompt

# cool colored version:
coolcolor='\033[33m' # with the 2nd 33 being the colorcode [30-37]
normal='\033[0m'
export PS1="\u@\[$coolcolor\]\h\[$normal\]:\w \[$coolcolor\]$\[$normal\] "

OpenSSL

Generate new private key and certificate signing request:

$ openssl req -out server.csr -new -newkey rsa:4096 -nodes -keyout private.key

Generate csr for existing private key:

$ openssl req -out server.csr -key private.key -new

Check a certificate:

$ openssl x509 -noout -text -in certificate.crt

Get the fingerprint of a certificate, possible flags are -sha1 -sha256 or -md5.

$ openssl x509 -noout -fingerprint -sha1 -in certificate.crt

Remember: transporting .csr of .crt can be done in the clear without any fear, they are useless without the corresponding private.key

Generate Diffie-Hellman parameters: (takes a long time)

$ openssl dhparam -out dhparam.pem 4096

Check an SSL connection:

$ openssl s_client -connect www.example.com:443

Create a pfx or pkcs#12 file that contains both private key and certificate and is password protected:

$ openssl pkcs12 -export -out key_and_cert.pfx -inkey privkey.pem -in fullchain.pem

More useful stuff on openssl-commands

SSH keys

Generate Ed25519 key pair:

$ ssh-keygen -o -a 100 -t ed25519 -f ~/.ssh/id_ed25519 -C "foo@bar.com"

Although I prefer ed25519, you might want old fashion rsa keys:

$ ssh-keygen -t rsa -b 4096 -f ~/.ssh/id_rsa -C "foo@bar.com"

To add your key(s) to your server, use this nifty little tool:

$ ssh-copy-id user@host

Or when you just want to add one specific key:

$ ssh-copy-id -i ~/.ssh/id_rsa user@host

Add one file to the other

Okay, this is like basic stuff, but getting it wrong can be painful, so to append file1 to file2:

$ cat file1 >> file2

Compressing and decompressing files

Creating a simple zip from a directory:

$ zip -r filename.zip /path/to/directory

Unzip it with:

$ unzip filename.zip

Or you want to password protect it?

$ zip -e filename.zip /path/to/directory

Since the encryption used by zip is weak, use 7z instead:

$ 7z a -p filename.7z /path/to/directory

Lots of archive on the net will be .tar.gz which you extract with:

$ tar -xf archive.tar.gz

Reboot server tonight

Sometimes I want to reboot a machine but keep the impact from the downtime as low as possible, so I schedule the reboot at 06:00 in the morning, hoping the number of users currently using any of its services is close to 0 and in the case something went wrong, I can fix it when at the office at 09:00 (This does indeed imply that we are okay with the 3 hours downtime)

$ sudo at 06:00
warning: commands will be executed using /bin/sh
at> /sbin reboot
[ctrl-d]

You can check the queue of scheduled jobs with:

$ sudo atq
1	Tue Jan 14 10:00:00 2020 a root

And remove a job with:

$ sudo atrm 1

Send a test mail

$ mail -s "TEST!" remy.blom@hku.nl < /dev/null

Hardening my freshly installed OpenBSD 6.5 box

First I want to be able to use my regular user, the one I made during installation, to use doas which is pretty much something like sudo. Let’s edit the file /etc/doas.conf to enable it.

Ah, and now it turns out that my favorite editor is not available by default, so let’s first install that. I install nano in this process, but you might like another editor, or even, you might be happy using vi, whatever your preferences are, this is the time to make them available!!

$ su root
# pkg_add nano

On a recent install pkg_add wasn’t working, giving me errors like:

# pkg_add nano
https://cdn.openbsd.org/pub/OpenBSD/6.9/packages-stable/amd64/: TLS handshake failure: ocsp verify failed: ocsp response not current
https://cdn.openbsd.org/pub/OpenBSD/6.9/packages/amd64/: TLS handshake failure: ocsp verify failed: ocsp response not current
https://cdn.openbsd.org/pub/OpenBSD/6.9/packages/amd64/: empty
Can't find nano

The problem was my clock was ahead 2 hours:

# date
Wed May 26 19:08:28 CEST 2021
# date 1709
Wed May 26 17:09:00 CEST 2021

And now pkg_add was working just as it should.

doas

And now we have nano at our fingertips, so let’s put that to effect:

$ su root
# nano /etc/doas.conf

create the file with the following content, permitting users from the wheel group to do-as…

permit persist :wheel

ssh & sshd

One of the first things I like to do is enabling hasing of the hostnames in ~/.ssh/known_hosts so an attacker is not able to see which boxes I visit from this machine. In /etc/ssh/ssh_config set:

HashKnownHosts yes

Next I only want to use public-private key authentication on ssh. So first let’s upload my public key, from my local machine:

$ ssh-copy-id -i id_rsa user@hostname

As soon as we verified that the key is working we disable password login for the ssh-server in /etc/ssh/sshd_config make sure to set:

PasswordAuthentication no
ChallengeResponseAuthentication no

And we reload sshd:

$ doas rcctl reload sshd

And now log out and back in.

firewall

Trying to read and learn about PF, the OpenBSD Packet Filter, that can do firewalling, NAT, just to name a few, I was a bit overwhelmed. And I actually had a hard time finding examples of rules that would do what I wanted. In the end I just sad down, and with some trail and error I ended up with a simple set of rules that did what I wanted, which I added to the end of /etc/pf.conf

# here I go!! following conf by R3MY B7OM!
#
# WHAT I WANT:
#
# pass all out, block all in, except on http/https

web = "{ 80, 443 }"

block in
pass out

pass in proto tcp from any to any port $web

# I want to restrict access to any port to a group of trusted ip/ranges:
# 10.1.0.0/16       # Some IP Range that I trust
# 192.168.0.0./16   # Other IP Range that is okay!

trusted = "{ 10.1.0.0/16, 192.168.0.0/16, server.hostname.com foo.hostname.com }"

pass in proto tcp from $trusted to any

To activate the current config type:

$ doas pfctl -f /etc/pf.conf

Do take care tho, you might apply rules that shut yourself out of your box. I saw people do cronjobs that disable pf every 2 minutes or so, but as long as you have access to the console, you don’t need these fancy work-arounds, you just use the console to change your ruleset.

Now in the above ruleset I opened up 80 and 443 for http and https traffic, but I have not yet installed any webserver. But to test the correct rules are set in pf you can use this very useful command:

$ doas nc -l 80

It starts listening on port 80. doas is needed for lower port-numbers. You can use telnet to connect to the port and everything you enter there will echo here. Great little tool.

$ telnet hostname 80

syspatch and pkg_add

To keep your system up-to-date you should regularly check to see patches are available:

$ doas syspatch -c

Install the available patches:

$ doas syspatch

Keeping installed packages up-to-date, use:

$ doas pkg_add -u

Only see what pkg_add -u will do:

$ doas pkg_add -us

Now that we have this out of the way, let’s install the famous LEMP-stack!

Installing OpenBSD 6.5

Let’s go!

I will run thru the installation process and point out the choices I made: Defaults answers are shown in []’s and are selected by pressing RETURN

(I)nstall, (U)pgrade, (A)utoinstall or (S)hell? I
Choose your keyboard layout ('?' or 'L' for list) [default]
System hostname? (short form, e.g. 'foo') hostname
Which network intercae do you wish to configure? (or 'done') [vio0]
IPv4 address for vio0? (or 'dhcp' or 'none) [dhcp]
IPv6 address for vio0? (or 'autoconf' or 'none') [none] autoconf
Which network intercae do you wish to configure? (or 'done') [done]
DNS domain name? (e.g. 'example.com') [my.domain] foo.com

Password for root account? (will not echo)
Password for root account? (again)
Start sshd(8) by default? [yes]
Do you expect to run the X window System? [yes] no
Setup a user? (enter a lower-case loginname, or 'no) [no] username
Full name for user username? [username]
Password for user username? (will not echo)
Password for user username? (again)
Allow root ssh login? (yes, no, prohibit-password) [no]
What timezone are you in? ('?' for list) [Europe/Amsterdam]
Which disk is the root disk? ('?' for details) [sd0]
Use (W)hole disk MBR, whole disk (G)PT or (E)dit? [whole]
User (A)auto layout, (E)dit auto layout or create (C)ustom layout? [a] a

(I noticed that the /var partition is only getting 5G and /home is getting 22G. I rather have a much bigger /var directory: 25G and a much smaller /home of 2G, but at the moment I am not really familiar with the editor I get, so I’m hoping to alter this after installation, or read into it and do it at a next installation.

Let's install the sets!
Location of sets? (disk http or 'done') [http]
HTTP proxy URL? (e.g. 'http://proxy:8080', or 'none') [none]
HTTP Server? (hostname, list#, 'done' or '?') [?]

Choose the nearest mirror from the list:

HTTP Server? (hostname, list#, 'done' or '?') [?] 32
HTTP Server? (hostname, list#, 'done' or '?') [ftp.nluug.nl]
Server directory? [pub/OpenBSD/6.5/amd64]
Set name(s)? (or 'abort' or 'done') [done] -game*
Set name(s)? (or 'abort' or 'done') [done]
...
Location of sets? (disk http or 'done') [done]
...
Ready!!! Let’s reboot!

So installing OpenBSD is a rather straight forward process. The most important thing is to disallow root access over ssh. Let’s now dive into hardening this OpenBSD install.

Migrating from Ubuntu to OpenBSD on one of my boxes

Ubuntu is getting way too big, I migrate to OpenBSD…

I have most of my domains and git repositories sit on one VPS. As a result of the fact that it was the first VPS I had, this box was the one that hosts most of my stuff. Back in the days I was quite happy installing Ubuntu LTS, updating from 12.04 to 14.04 to 16.04. But the latest version; 18.04 Bionic Beaver, had such big requirements, especially memory-wise, it’s installation failed on one of my newer and smaller boxes.

I starter looking at other options I ended up installing OpenBSD 6.5 and I was pretty happy with it’s structure and decided that for my private boxes I was going to switch to OpenBSD.

To be able to install a new OS the box should first be released of it’s current duties to run a handful of personal websites of me and some friends. That means moving everything to another box. Which is actually quite simple for now, it is only running a webserver with PHP, no database, and it hosts my personal git repositories over ssh.

So I’ll be moving /var/www and /var/git-bares using Rsync:

$ rsync -azP /var/www user@remote:~/backup-from-server

This will put the directory www inside ~/backup-from-server.

When you want to sync the content you’ll need a trailing slash: /var/www/

-a: “archive”, does a recursive sync and preserves symlinks, modtimes, ownership and permissions.

-z: “zip”, adds compression to the network transfer

-P: combines “progress” and “partial”

After that I move the files to the right position on the new target box and make sure they are being served, swap the DNS to point all domains to the new box and I have my first box ready for installing OpenBSD 6.5.

Installing LEMP on Ubuntu 18.04 LTS

Just got a new box setup which needs a LEMP-stack. So here we go: install the packages for nginx, php, mariaDB:

$ sudo apt install nginx mariadb-server php-fpm php-mysql

Configure nginx

In /etc/nginx/nginx.conf replace SSL Settings part:

##
# SSL Settings
##

ssl_protocols TLSv1.2 TLSv1.3; 
ssl_session_cache shared:SSL:20m;
ssl_session_timeout 180m;
ssl_prefer_server_ciphers on;
ssl_ciphers EECDH+AESGCM:EDH+AESGCM:AES256+EECDH:AES256+EDH;
ssl_dhparam /etc/nginx/cert/dhparam.pem;
ssl_stapling on;
ssl_stapling_verify on;
resolver 8.8.8.8 8.8.4.4 valid=300s;
resolver_timeout 5s;
add_header Strict-Transport-Security "max-age=31536000" always;

And my custom Logging Settings:

##
# Logging Settings
##

log_format combined_ssl '$time_local $status $host:$server_port $remote_user@$remote_addr $ssl_protocol/$ssl_cipher "$request" $body_bytes_sent ref:$http_referer "$http_user_agent"';
access_log /var/log/nginx/access.log combined_ssl;
error_log /var/log/nginx/error.log;

And redirect everybody to https:

##
# Redirect everybody to https
##

server {
    listen 80 default_server;
    listen [::]:80 default_server;
    server_name _;
    return 301 https://$host$request_uri;
}

Lastly let’s generate some Diffie Hellman parameters, disable the default site and restart nginx:

$ sudo openssl dhparam -out /etc/nginx/cert/dhparam.pem 4096
$ sudo rm /etc/nginx/sites-enabled/default
$ sudo service nginx restart

You should now have a working nginx installation that redirects all traffic to https, but you’ll need to configure at least one virtual host with working SSL certificates to get something to display in your browser.

MariaDB Hardening

$ sudo mysql_secure_installation

You should be using sudo to connect to mariaDB with root, which will cause a problem when you want to be able to connect thru phpMyAdmin. You can fix this by changing the authentication plugin for root to mysql_native_password:

$ sudo mysql -u root -p
MariaDB [(none)]> use mysql;
MariaDB [mysql]> update user set plugin='mysql_native_password' where user='root';
MariaDB [mysql]> flush privileges;

PHP

In /etc/php/7.2/fpm/php.ini set your timezone:

date.timezone = Europe/Amsterdam

phpMyAdmin

I tried installing the phpMyAdmin package via apt but never got that working, so I just download the source and use that. In the directory /var/www/ download the latest ENGLISH only version of phpMyAdmin from their website at https://www.phpmyadmin.net/downloads/

$ wget https://files.phpmyadmin.net/phpMyAdmin/4.9.0.1/phpMyAdmin-4.9.0.1-english.tar.gz
$ tar -xvzf phpMyAdmin-4.9.0.1-english.tar.gz
$ cp config.sample.inc.php config.inc.php

Let’s configure phpMyAdmin by editting config.inc.php:

Add a blowfish secret and play around with ‘host’; when connecting to a unix-socket, use localhost, when connecting using TCP/IP use 127.0.0.1.

You can give any of your virtual hosts access to phpMyAdmin by creating a symlink in it’s websroot to /var/www/phpMyAdmin-4.9.0.1-english/. I also limit access to it in the nginx configuration of that vhost:

location /phpmyadmin {
	allow 10.1.0.0/16;	# example
	deny all;
}

When you are able to login as root phpMyAdmin will give some pointers to improve your installation, like adding a tmp directory, adding missing php-modules, etc.

Hardening Ubuntu 18.04 LTS

Just got a new box setup and delivered to me by the company’s IT department. They setup a user-account with sudo privileges and included my public ssh-key. But in case you only have a root account you should create a user-account with sudo privileges yourself:

$ adduser username
$ usermod -aG sudo username

And from your local machine upload your public key:

$ ssh-copy-id -i .ssh/id_rsa user@hostname

So let’s start hardening. First let’s set a new password:

$ passwd

After that I needed to set another hostname, since the one I got from IT was not what I asked for:

$ sudo nano hostname
$ sudo nano hosts
$ sudo reboot 

ssh & sshd

In /etc/ssh/sshd_config set:

PermitRootLogin no 
PasswordAuthentication no 

In /etc/ssh/ssh_config set:

HashKnownHosts yes

firewall

Use a firewall to block all unwanted traffic to your machine. Only open up the ports you want publicly available and limit access to your ssh-port to known IP’s only.

$ sudo ufw allow from 10.2.0.0/16
$ sudo ufw allow http 
$ sudo ufw allow https
$ sudo ufw enable
$ sudo ufw status numbered

unattended updates

Make sure the package is installed and running:

$ sudo apt install unattended-upgrades
$ sudo service unattended-upgrades status

Edit /etc/apt/apt.conf.d/50unattended-upgrades to do only security updates on production machines. Only out-comment the following lines:

"${distro_id}:${distro_codename}";
"${distro_id}:${distro_codename}-security";
"${distro_id}ESM:${distro_codename}";

Security updates may need dependencies from non-security origins. EMS, or extended security maintenance is for releases that have reached end of life, like 14.04 LTS.

Further you can play with settings like:

Unattended-Upgrade::Mail "your@email.com";
Unattended-Upgrade::MailOnlyOnError "false";
Unattended-Upgrade::Remove-Unused-Kernel-Packages "true";
Unattended-Upgrade::Remove-Unused-Dependencies "true";
Unattended-Upgrade::Automatic-Reboot "true";
Unattended-Upgrade::Automatic-Reboot-Time "04:00";

Doing automatic-reboots at night are at your own risk, I don’t do that on production machines, but really think it is perfectly fine on private, personal and development boxes. And I have never had anything go wrong with them, ever…

Add/edit /etc/apt/apt.conf.d/20auto-upgrades:

APT::Periodic::Update-Package-Lists "1";
APT::Periodic::Download-Upgradeable-Packages "1";
APT::Periodic::AutocleanInterval "7";
APT::Periodic::Unattended-Upgrade "1";

The unattended upgrades are initiated by your daily crontab, in my case this runs at 06:25 by default, which I think is a little late to also do a reboot, so I changed the time my daily crontab runs by editing /etc/crontab:


# m h dom mon dow user	command
17 *	* * *	root    cd / && run-parts --report /etc/cron.hourly
0  3	* * *	root	test -x /usr/sbin/anacron || ( cd / && run-parts --report /etc/cron.daily )
47 6	* * 7	root	test -x /usr/sbin/anacron || ( cd / && run-parts --report /etc/cron.weekly )
52 6	1 * *	root	test -x /usr/sbin/anacron || ( cd / && run-parts --report /etc/cron.monthly )

Test

$ sudo unattended-upgrades --dry-run --debug

Checkrestart

Another great way to see whether you need to reboot a machine or are just fine with reload/restarting services is the checkrestart command. It is not on the machine by default so you install it yourself:

$ sudo apt install debian-goodies

I added it to my .bash_profile so everytime I log into the machine I get to see which processes still use old versions of upgraded files.

echo 'Type password for checkrestart report'
sudo checkrestart

More stuff…

This list is of course incomplete and could be updated and expended over time… Things like fail2ban or appArmor might be added….

But for now let’s install that LEMP stack!